CentOS7.4 安装ELK6.4.2
与Mysql对比相关:
mysql -> Databases -> Tables -> Rows -> Columns
Elasticsearch -> Indices -> Types -> Documents -> Fields
Elasticsearch集群可以包含多个索引(indices)(数据库),每一个索引可以包含多个类型(types)(表),每一个类型包含多个文档(documents)(行),然后每个文档包含多个字段(Fields)(列)。
官网:点我
一、准备工作
客户机(日志所在机器): 安装filebeat
elk机器: 安装elasticsearch,logstash,kibana(可分多台机器部署,端口开放即可)
1.1 基础环境:
> yum install net-tools vim wget zip unzip lrzsz pcre pcre-devel curl openssl openssl-devel openssh-server openssh-clients gcc-c++ zlib1g-dev zlib zlib-devel curl-devel expat-devel gettext-devel opgcc perl-ExtUtils-MakeMaker bzip2
1.2 系统配置
> sysctl -w vm.max_map_count=262144
> sysctl –p
> sudo swapoff -a

> vi /etc/security/limits.conf
*  hard nofile 65536
* soft nofile 65536

> vim /etc/security/limits.d/20-nproc.conf
*          soft    nproc     4096
root       soft    nproc     unlimited
1.3 安装java
> export JAVA_HOME=$JAVA_HOME
> ln -s /usr/local/java/jdk1.8.0_171/bin/java /usr/bin/java
二、安装ELK
2.1 安装elasticsearch (yum方式)
> rpm --import https://artifacts.elastic.co/GPG-KEY-elasticsearch
> vi /etc/yum.repos.d/elasticsearch.repo
[elasticsearch-6.x]
name=Elasticsearch repository for 6.x packages
baseurl=https://artifacts.elastic.co/packages/6.x/yum
gpgcheck=1
gpgkey=https://artifacts.elastic.co/GPG-KEY-elasticsearch
enabled=1
autorefresh=1
type=rpm-md

> sudo yum install elasticsearch
> vi /etc/elasticsearch/elasticsearch.yml
cluster.name: es-log
node.name: log-1
network.host: 0.0.0.0
path.data: /var/lib/elasticsearch
path.logs: /var/log/elasticsearch
bootstrap.memory_lock: true
discovery.zen.ping.unicast.hosts: ["192.168.2.107"]
discovery.zen.minimum_master_nodes: 1

> vi /etc/elasticsearch/jvm.options
-Xms4g
-Xmx4g

> cat /etc/sysconfig/elasticsearch
> vi /etc/systemd/system/elasticsearch.service.d/override.conf
[Service]
LimitMEMLOCK=infinity

> sudo systemctl daemon-reload
> systemctl start elasticsearch.service
> curl http://192.168.2.107:9200

#防火墙放开9200端口
> firewall-cmd --zone=public --add-port=9200/tcp --permanent
> systemctl restart firewalld
> systemctl daemon-reload
#开机启动
> systemctl enable elasticsearch.service

#创建一条test的索引,type为name,id=1:
> curl -H "Content-Type:application/json" -XPOST '192.168.2.107:9200/test/name/1' -d '
{
  "name": "sunjianhua"
}'

#查看:
> curl  -XGET '192.168.2.107:9200'/test/name/1
#查看一下集群当前的状态:
> curl  -XGET '192.168.2.107:9200'
> curl  -XGET '192.168.2.107:9200/_cluster/health?pretty'

#查看max_file_descriptors:
> curl -XGET http://localhost:9200/_nodes/stats/process?filter_path=**.max_file_descriptors
2.1.1 docker安装es
https://www.elastic.co/guide/en/elasticsearch/reference/6.4/docker.html

> docker pull docker.elastic.co/elasticsearch/elasticsearch:6.4.2
> docker run -p 9200:9200 -p 9300:9300 -e "discovery.type=single-node"
docker.elastic.co/elasticsearch/elasticsearch:6.4.2
2.1.2 head和x-pack插件安装
安装head(图形化界面查看es):
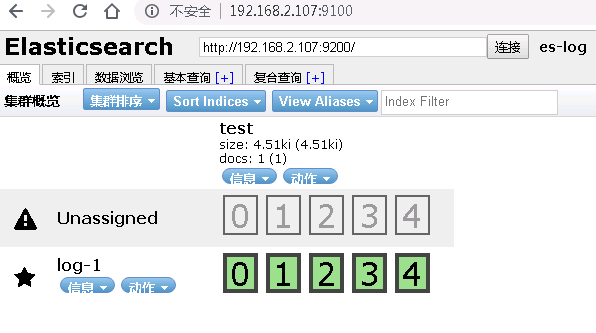
> git clone git://github.com/mobz/elasticsearch-head.git
> cd elasticsearch-head
> npm install
> npm install -g grunt-cli
> grunt server

> firewall-cmd --zone=public --add-port=9100/tcp --permanent
> firewall-cmd --reload
#浏览器访问:http://192.168.2.107:9100
#服务启动与关闭
#后台方式启动
> cd /usr/share/elasticsearch-head/ && nohup grunt server &
#关闭head
> netstat -tunlp |grep 9100
#杀死进程
> kill -9 进程id
#增加以下两个配置(跨域访问)
> vim /etc/elasticsearch/elasticsearch.yml
http.cors.enabled: true
http.cors.allow-origin: "*"
#重新启动elasticsearch-head就可以正常检索了
#查看集群状态:curl -XGET http://localhost:9200/_cat/health?v
#查看集群节点:curl -XGET http://localhost:9200/_cat/nodes?v
#查询索引列表:curl -XGET http://localhost:9200/_cat/indices?v
#创建索引:curl -XPUT http://localhost:9200/customer?pretty
#查询索引:curl -XGET http://localhost:9200/customer/external/1?pretty
#删除索引:curl -XDELETE http://localhost:9200/customer?pretty
Xpack默认已经安装了 此处忽略
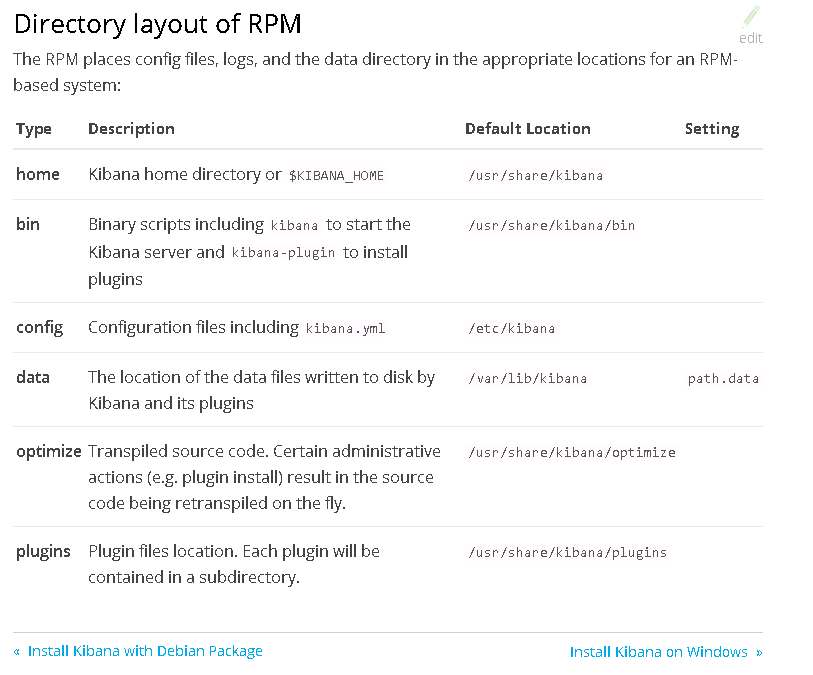
2.2 安装kibana (yum方式)
> rpm --import https://artifacts.elastic.co/GPG-KEY-elasticsearch
> vi /etc/yum.repos.d/kibana.repo
[kibana-6.x]
name=Kibana repository for 6.x packages
baseurl=https://artifacts.elastic.co/packages/6.x/yum
gpgcheck=1
gpgkey=https://artifacts.elastic.co/GPG-KEY-elasticsearch
enabled=1
autorefresh=1
type=rpm-md

> sudo yum install kibana
> sudo /bin/systemctl daemon-reload
> sudo /bin/systemctl enable kibana.service
> sudo systemctl start kibana.service
> sudo systemctl stop kibana.service
# 开放防火墙(可忽略,使用nginx代理,见下文)
> firewall-cmd --zone=public --add-port=5601/tcp --permanent
> firewall-cmd --reload
#配置参考:
https://www.elastic.co/guide/en/kibana/6.4/settings.html
> vim /etc/kibana/kibana.yml
server.host: "192.168.2.107"
elasticsearch.url: http://192.168.2.107:9200
# Ps:没有用x-pack(收费),所以安全性用nginx passwd解决
> sudo yum -y install httpd-tools
> htpasswd -c /usr/local/nginx/http-users/kibanapwd kibana #创建kibana 用户,回车之后输入密码
安装[nginx][5]
server {
listen 15601;
server_name 192.168.2.107;
auth_basic "Restricted Access";
auth_basic_user_file /usr/local/nginx/http-users/kibanapwd;
location / {
proxy_pass http://192.168.2.107:5601;
proxy_http_version 1.1;
proxy_set_header Upgrade $http_upgrade;
proxy_set_header Connection 'upgrade';
proxy_set_header Host $host;
proxy_set_header X-Real-IP $remote_addr;
proxy_set_header X-Forwarded-For $proxy_add_x_forwarded_for;
proxy_cache_bypass $http_upgrade;
}
}
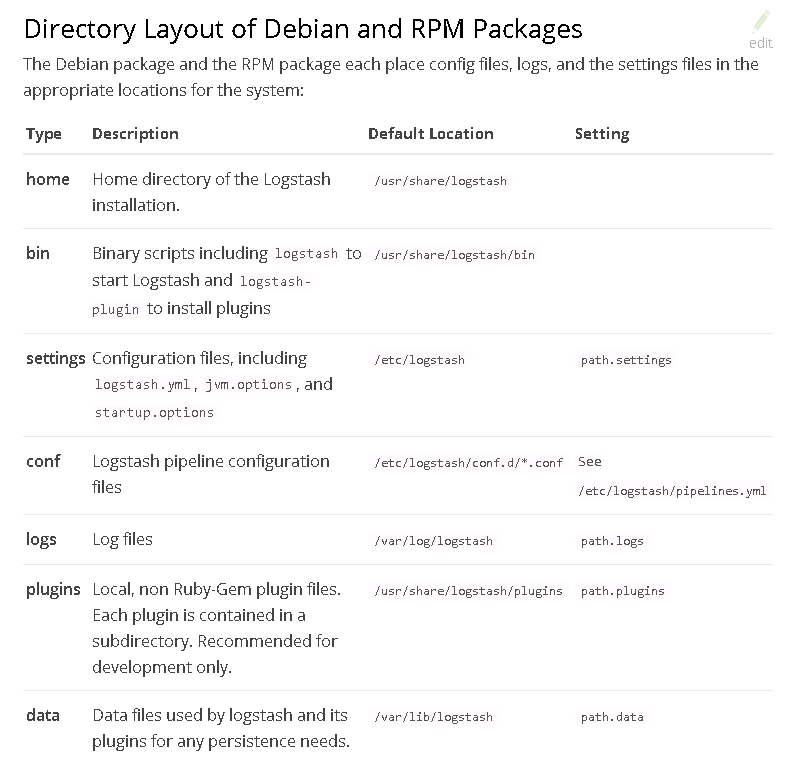
2.3 安装logstash (yum方式)
https://www.elastic.co/guide/en/logstash/current/installing-logstash.html

> rpm --import https://artifacts.elastic.co/GPG-KEY-elasticsearch
> vi /etc/yum.repos.d/logstash.repo

[logstash-6.x]
name=Elastic repository for 6.x packages
baseurl=https://artifacts.elastic.co/packages/6.x/yum
gpgcheck=1
gpgkey=https://artifacts.elastic.co/GPG-KEY-elasticsearch
enabled=1
autorefresh=1
type=rpm-md
> sudo yum install logstash
> sudo  systemctl enable logstash.service
> sudo /bin/systemctl daemon-reload
> sudo systemctl start logstash.service

#配置参考:
https://www.elastic.co/guide/en/logstash/6.4/setup-logstash.html
# 启动样例
> bin/logstash -f logstash-simple.conf
#https://www.elastic.co/guide/en/logstash/6.4/config-examples.html
#input 插件
https://www.elastic.co/guide/en/logstash/6.4/input-plugins.html
#Filter插件
https://www.elastic.co/guide/en/logstash/6.4/filter-plugins.html
#Output 插件
https://www.elastic.co/guide/en/logstash/6.4/output-plugins.html
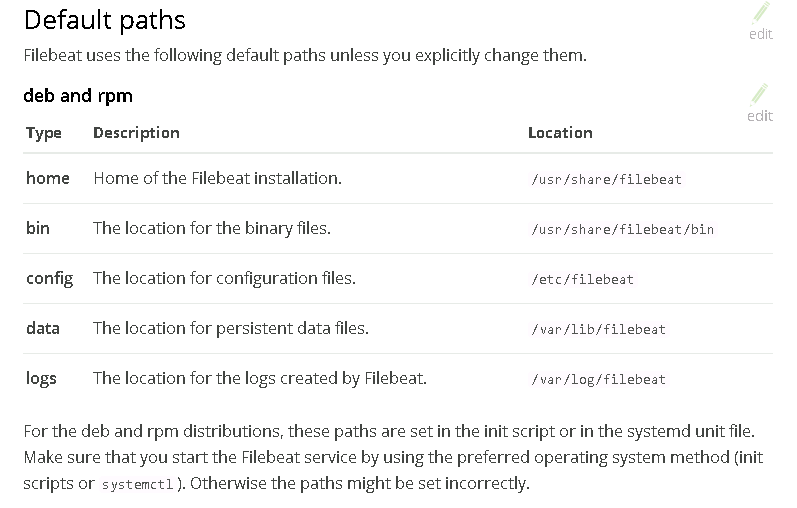
2.4 安装filebeat (yum方式)
https://www.elastic.co/products/beats/filebeat
https://www.elastic.co/downloads/beats
前提安装了以上三个

> sudo rpm --import https://packages.elastic.co/GPG-KEY-elasticsearch
> vi /etc/yum.repos.d/filebeat.repo

[elastic-6.x]
name=Elastic repository for 6.x packages
baseurl=https://artifacts.elastic.co/packages/6.x/yum
gpgcheck=1
gpgkey=https://artifacts.elastic.co/GPG-KEY-elasticsearch
enabled=1
autorefresh=1
type=rpm-md
> sudo yum install filebeat
> sudo chkconfig --add filebeat
> vi /etc/filebeat/filebeat.yml
setup.kibana:
  host: "192.168.2.107:5601"
output.logstash:
  hosts: ["192.168.2.107:5044"]

# load index template
> filebeat setup --template -E output.logstash.enabled=false -E 'output.elasticsearch.hosts=
["192.168.2.107:9200"]'
# 删除重新load
> curl -XDELETE 'http://localhost:9200/filebeat-*'
# 启动
> sudo systemctl start filebeat
> sudo systemctl enable filebeat
三、日志收集
3.1 收集tomcat日志
3.1.1 配置filebeat
> vi /etc/filebeat/filebeat.yml

- type: log
  fields:
      service: zhongchou_houtai
  enabled: true
  registry_file: /var/lib/filebeat/registry
  paths:
    - /usr/local/tomcat_manage/logs/p2p_manage_dai

setup.kibana:
  host: "192.168.2.107:5601"
output.logstash:
  hosts: ["192.168.2.107:5044"]
3.1.2 配置logstash
> vi /etc/logstash/conf.d/tomcat.conf
input {
        beats {
                port => "5044"
        }
}

filter {
  if [type] == "zhongchou_nginx" {
        grok {
                patterns_dir => "/usr/share/logstash/patterns"
                match => { "message" => "%{NGINXACCESS}" }
                }
        }
        date {

                match => [ "log_timestamp","dd/MMM/YYYY:HH:mm:ss z" ]
        }
        geoip {
          source => "clientip"
        }

}

output {
  if [type] == "zhongchou_nginx" {
    elasticsearch {
        hosts => ["192.168.2.107:9200"]
        index => "zhongchou-nginx-%{+YYYY.MM.dd}"
        }
     }
  if [fields][service] == "zhongchou_houtai" {
    elasticsearch {
        hosts => ["192.168.2.107:9200"]
        index => "zhongchou-manage-%{+YYYY.MM.dd}"

        }
     }
}
3.2 收集nginx日志
类似以上,忽略
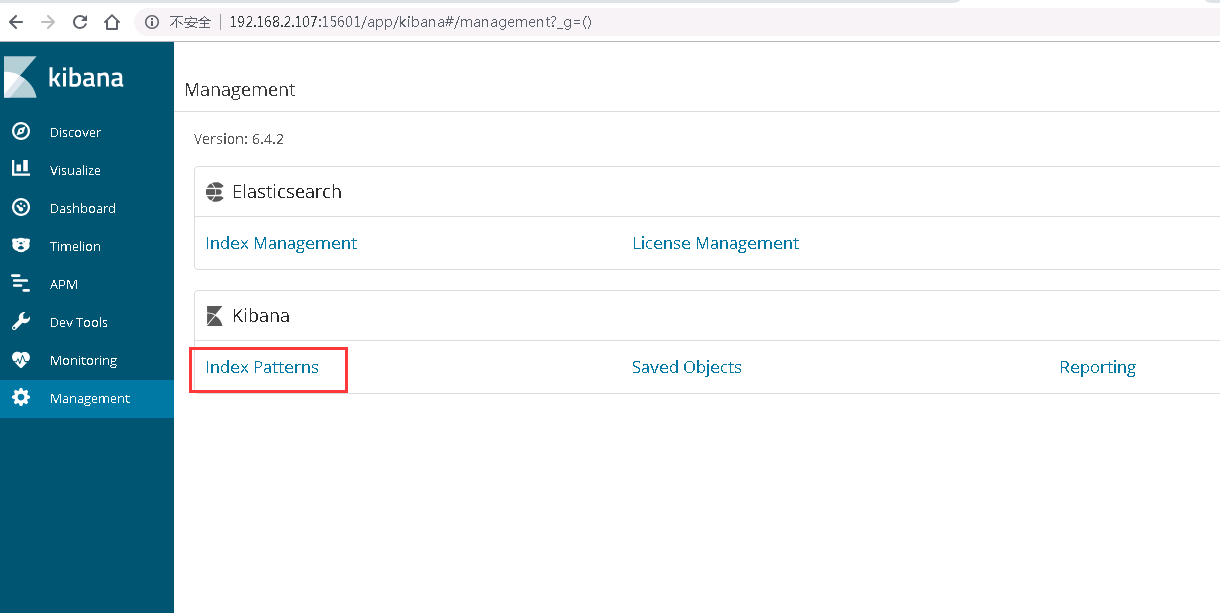
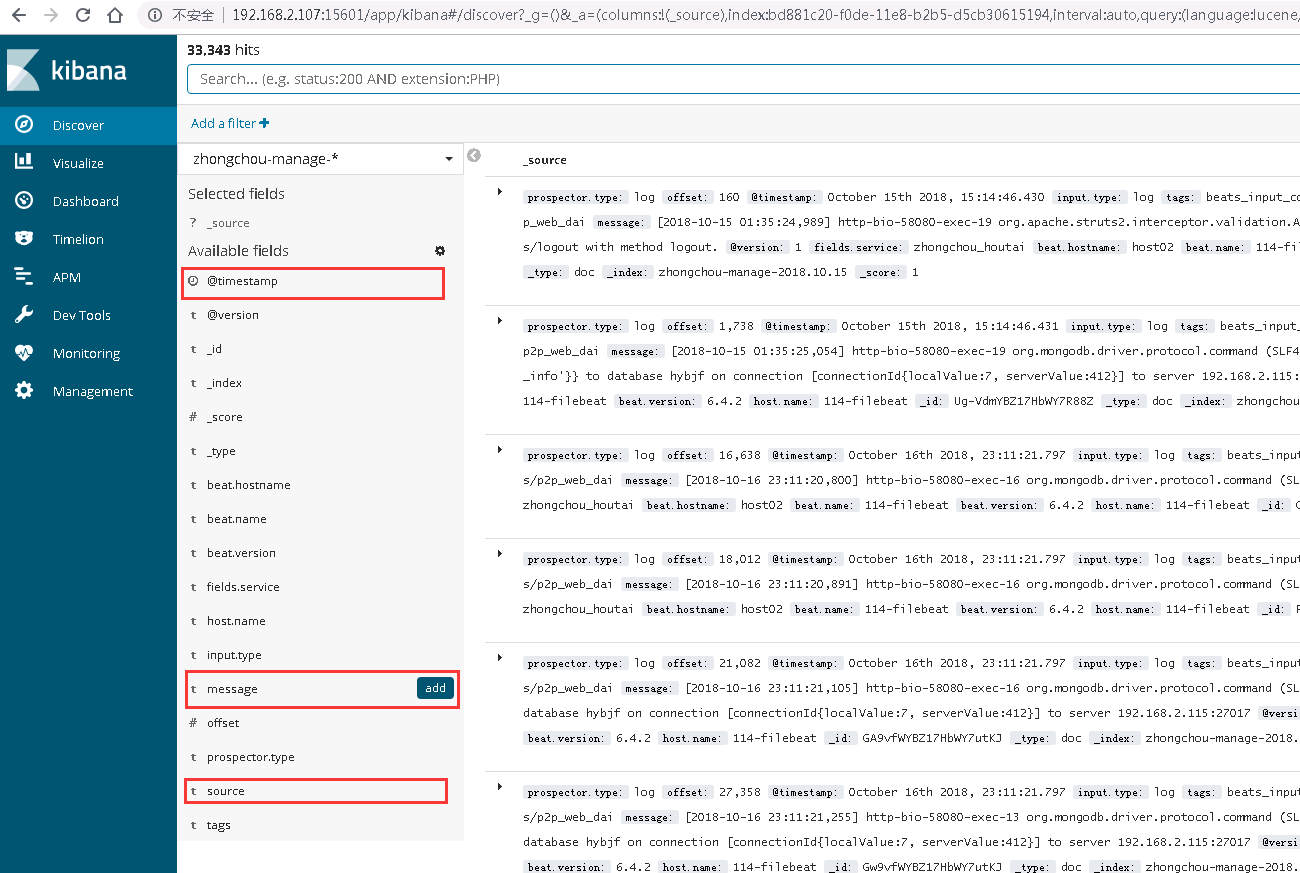
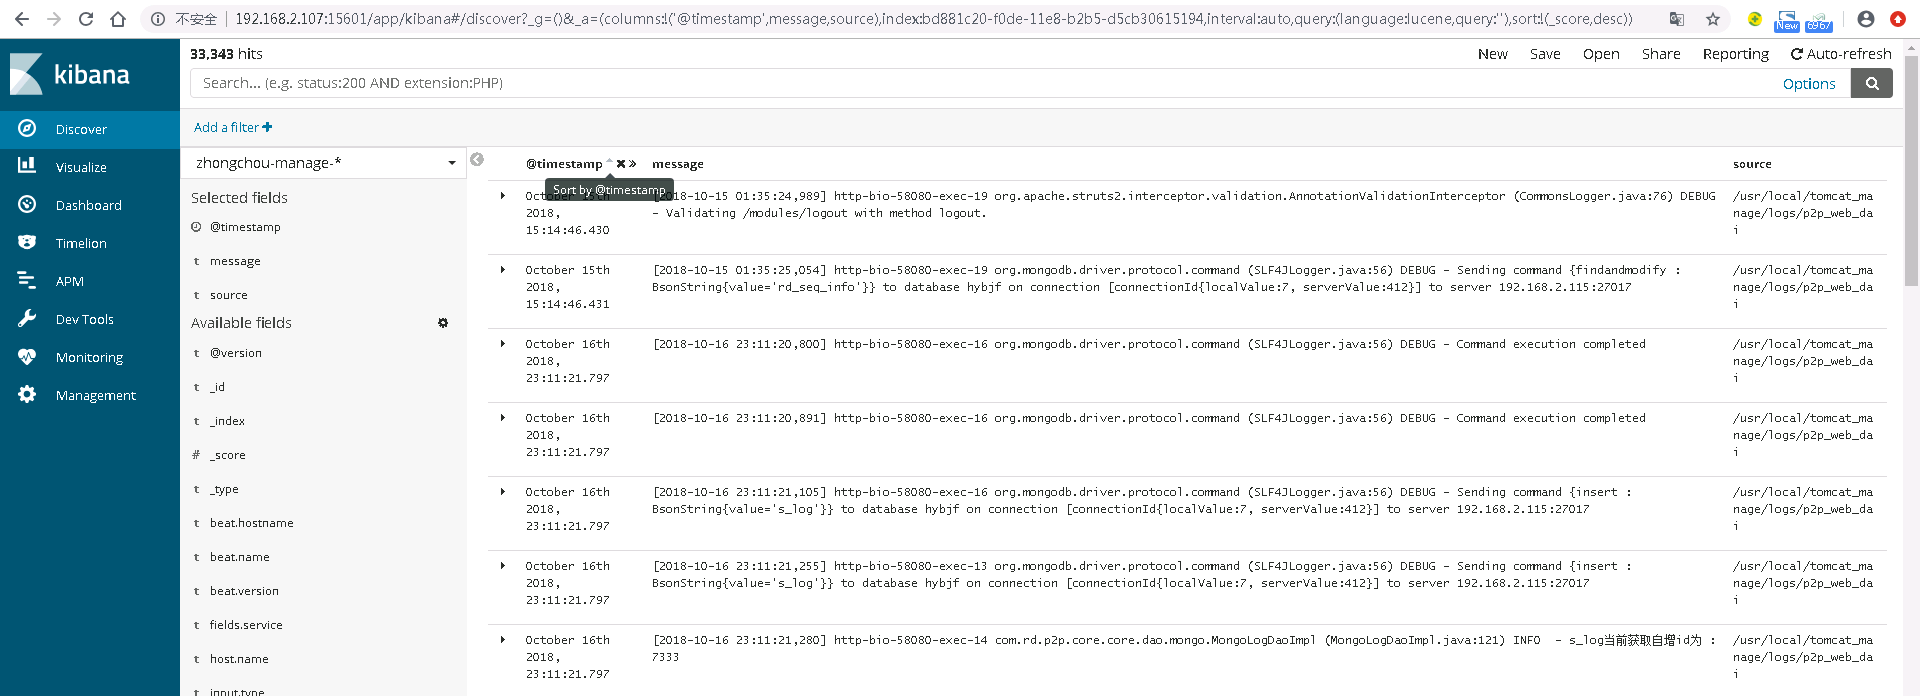
最后设置kibana:
http://192.168.2.107:5601/app/kibana
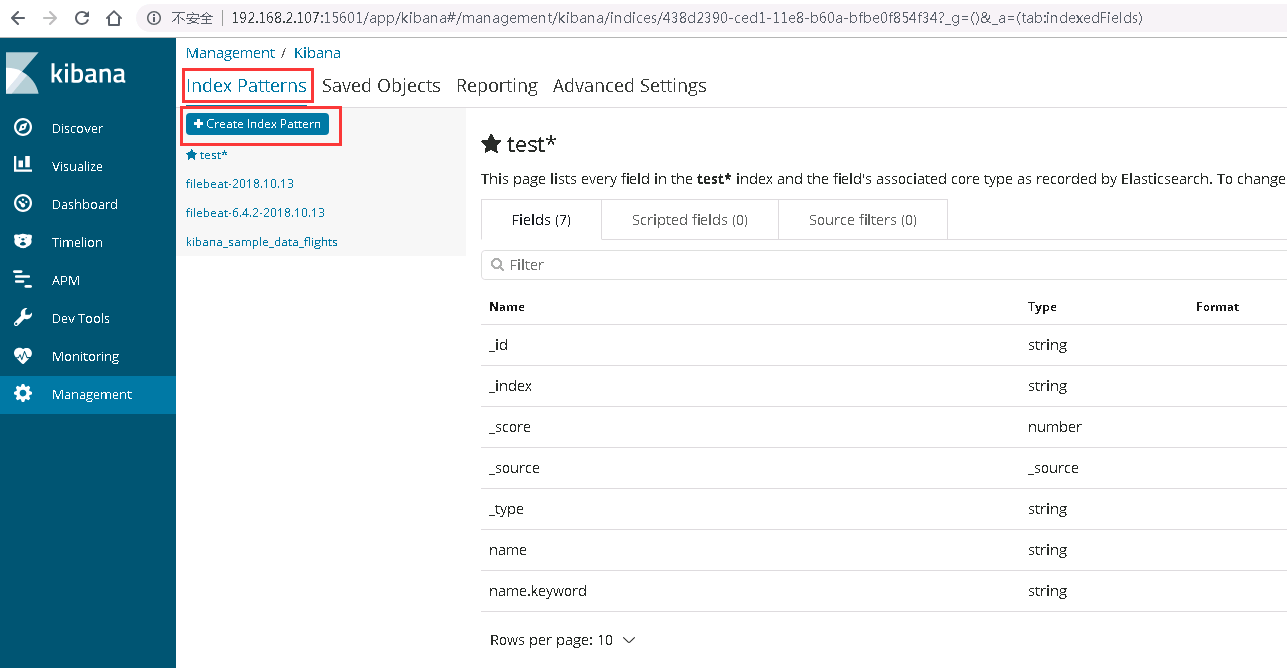
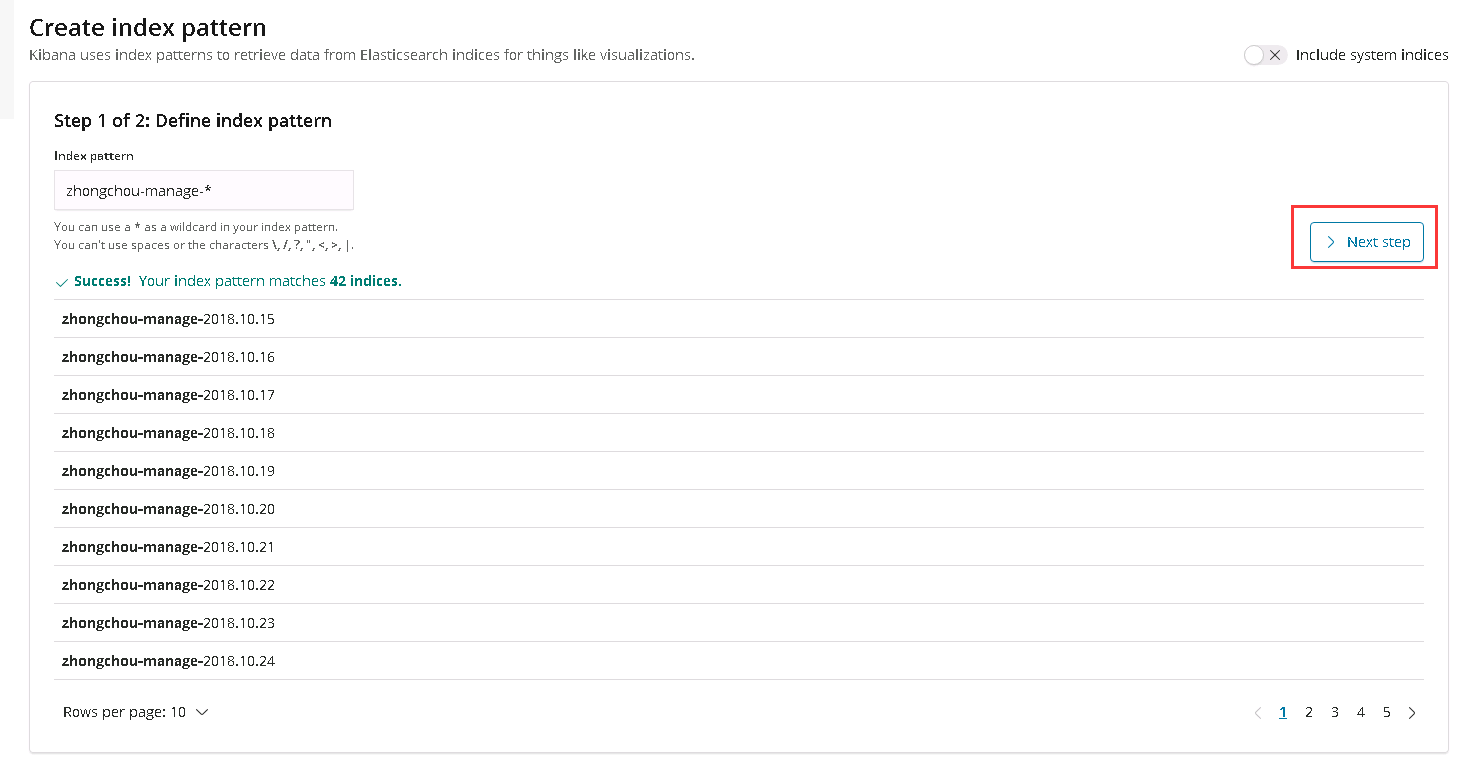
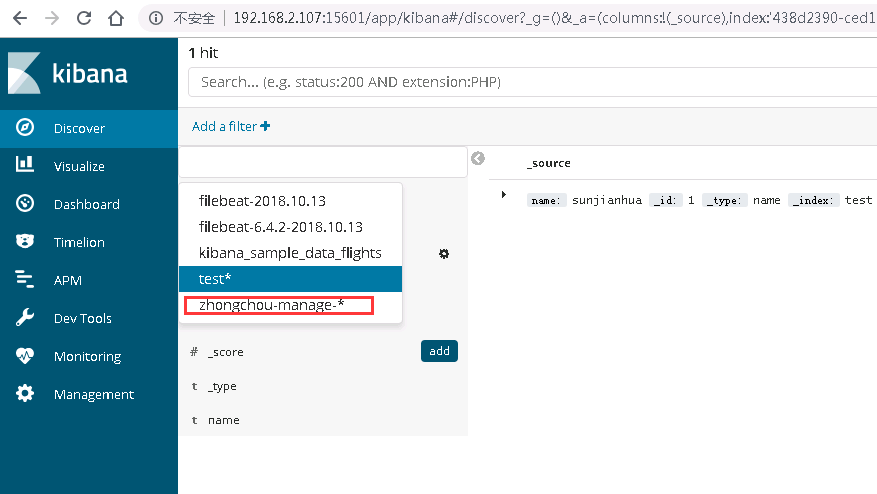
创建index pattern:
四、使用Kianba
中文文档: 点我
五、常见问题
5.1 maximum shards open
curl -X PUT -H "Content-Type:application/json" -d '{"transient":{"cluster":{"max_shards_per_node":10000}}}' 'http://192.168.2.132:9200/_cluster/settings'
版权属于:sunjianhua
本文链接:https://sunjianhua.cn/archives/elk.html
转载时须注明出处及本声明,如果不小心侵犯了您的权益,请联系邮箱:NTA2MTkzNjQ1QHFxLmNvbQ==
